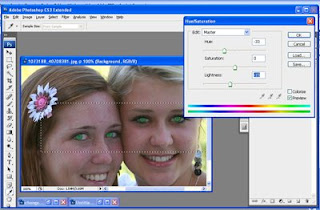
In this tutorial you will learn how to change the color of the eyes in just 3 simple to follow steps. Enjoy and please leave some comments…

You can download the sample image used in this tutorial together with the completed PSD
Step 1
Download the sample image above or use any picture that you would like and open it with Photoshop. Click on the Background Layer and press Ctrl + J to duplicate the background layer. After that you will see a new layer named Layer 1. Refer to picture below

Step 2
Now hide the Background layer by clicking the eye icon beside it. Then select Eraser tool with a hardness of 50%. Now click on Layer 1 and erase the eyeball carefully. Refer to picture below

Note: Make sure you choose a brush that is not so big as this will affect the quality of
Step 3
Now make the Background Layer visible and Select it by clicking on the layer name. Next select the rectangular marquee tool and select the entire eye area. Then go to Image > Adjustments > Hue / Saturation and select colorize at the bottom. Drag the sliders until you are satisfied with the output. And then merge the layers by pressing Ctrl + E
refer to pictures below


No comments:
Post a Comment